
github地址:lyc8503/UptimeFlare:✔ Cloudflare Workers 上的免费和无服务器正常运行时间监控/状态页面,具有特定于地理位置的检查 (github.com)
页面截图
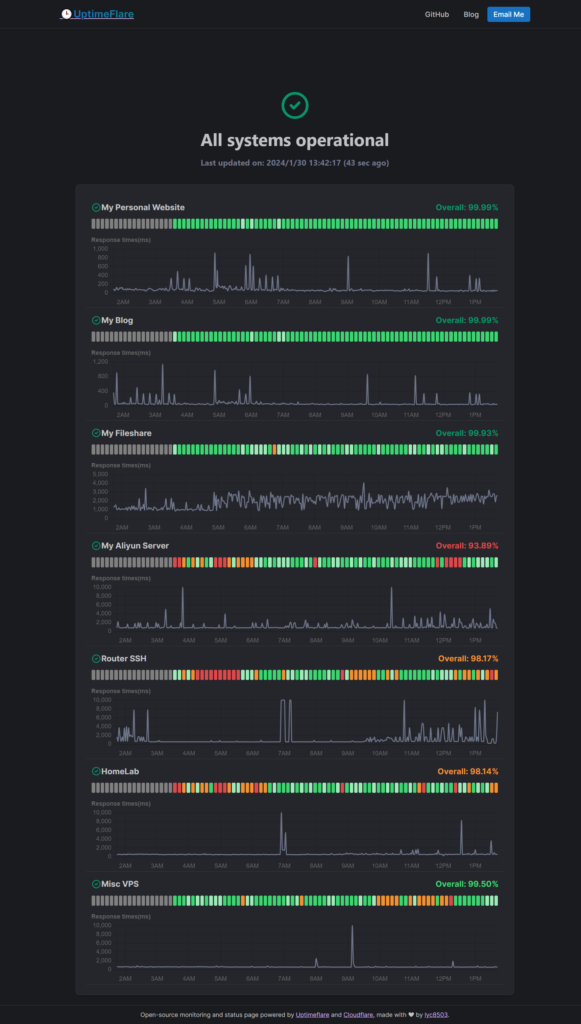
开源、易于部署(不到 10 分钟,无需本地工具)且免费
准备工作
1.cloudflare账户,free计划即可
2.github账户
操作步骤
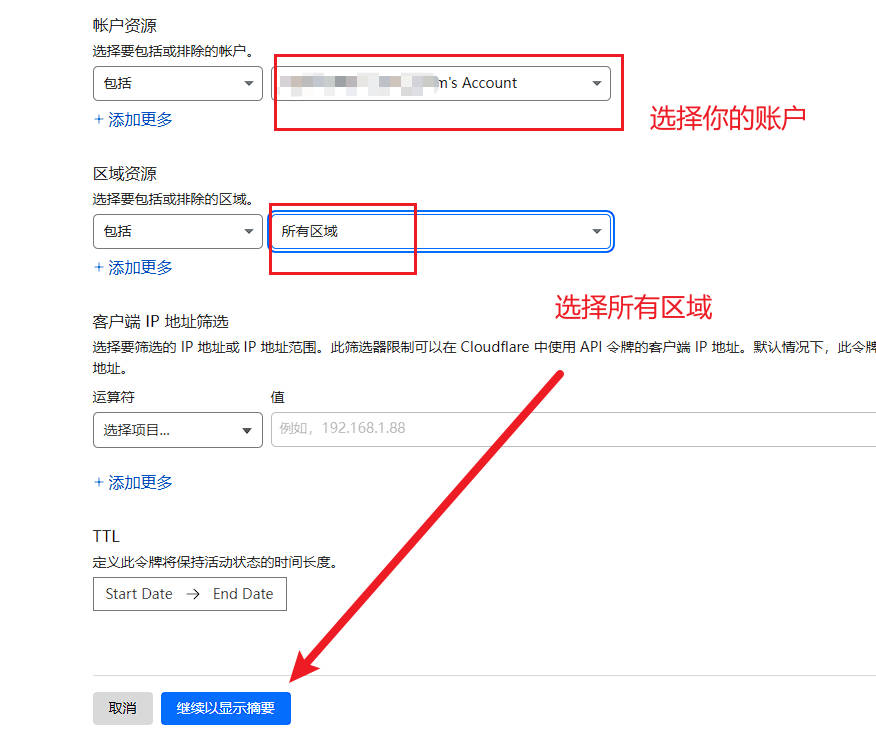
1.在 https://dash.cloudflare.com/profile/api-tokens,使用模板创建 API 令牌。Edit Cloudflare Workers
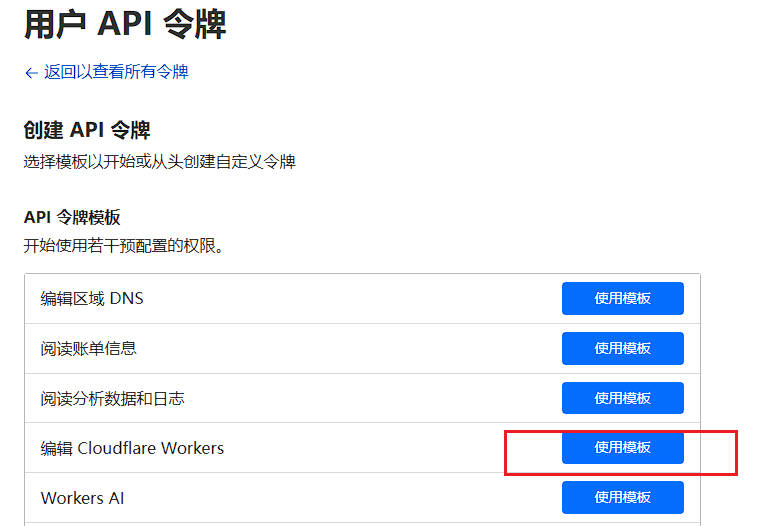
点继续,记录好你的api token!只会显示一次。不记得了就需要重新创建。
2.在你的github仓库中创建该项目的副本,Use this template
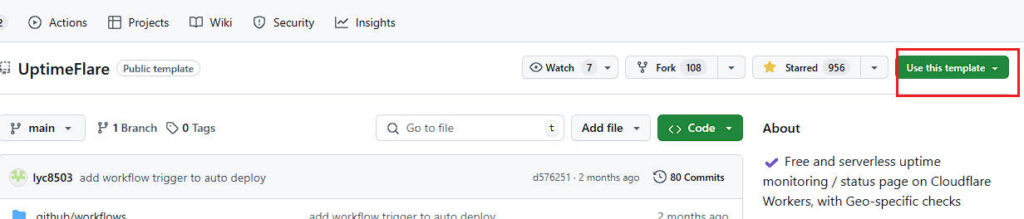
按需填写项目名称,选择public或者private,点击create
3.设置你的 Cloudflare API 令牌,添加一个密钥,其值是你在第 1 步中获得的api token令牌。
位置在:Settings - Secrets and variables - Actions-CLOUDFLARE_API_TOKEN
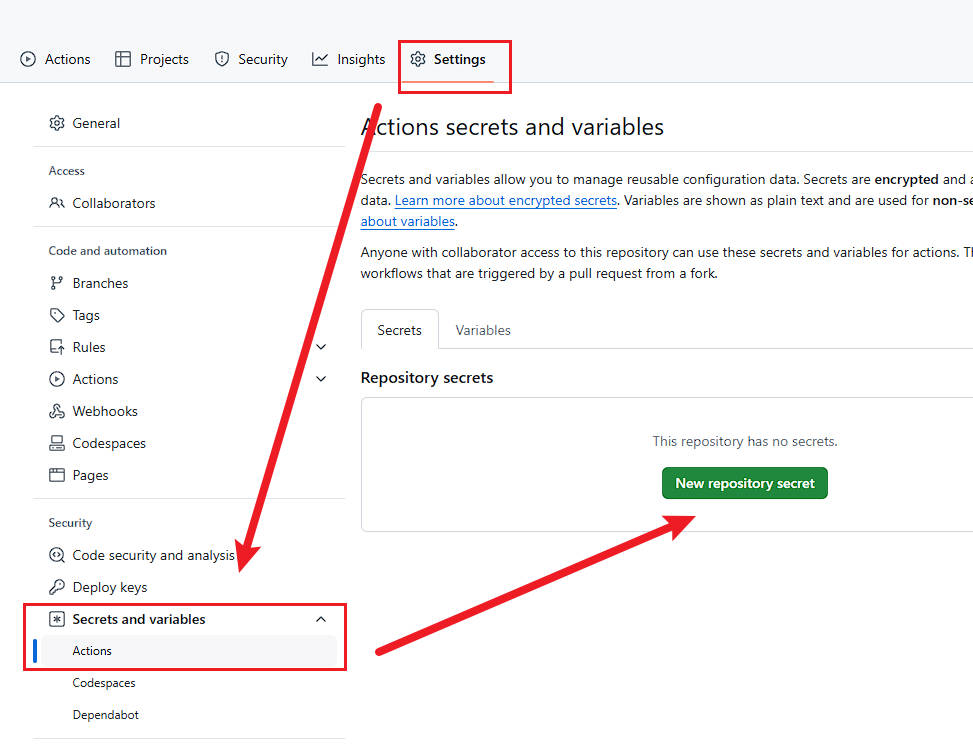
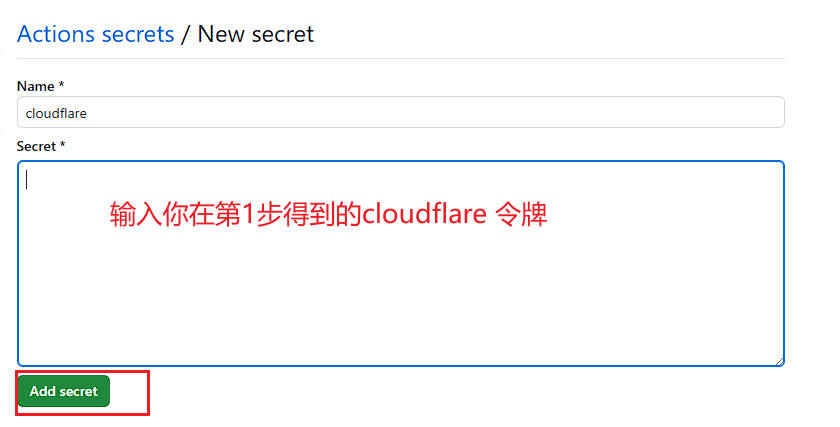
name随便写,输入令牌后点击add
4.编辑文件uptime.config.ts,编辑完成后,稍等片刻你就可以在 Cloudflare 帐户中看到已成功部署的状态页面。请在Workers & Pages下的概述里查看
uptime.config.ts需要修改的位置如下,其他保持默认即可
{
  // `id` should be unique, history will be kept if the `id` remains constant
  id: 'foo_monitor',
  // `name` is used at status page and callback message
  name: 'My API Monitor',
  // `method` should be a valid HTTP Method or "TCP_PING" for TCP port monitor
  method: 'POST',
  // `target` is a valid URL for HTTP or hostname:port for TCP
  target: 'https://example.com',
  // [OPTIONAL] `tooltip` is ONLY used at status page to show a tooltip
  tooltip: 'This is a tooltip for this monitor',
  // [OPTIONAL] `statusPageLink` is ONLY used for clickable link at status page
  statusPageLink: 'https://example.com',
  // [OPTIONAL] `expectedCodes` is an array of acceptable HTTP response codes, if not specified, default to 2xx
  expectedCodes: [200],
  // [OPTIONAL] `timeout` in millisecond, if not specified, default to 10000
  timeout: 10000,
  // [OPTIONAL] headers to be sent with HTTP monitor
  headers: {
    'User-Agent': 'Uptimeflare',
    Authorization: 'Bearer YOUR_TOKEN_HERE',
  },
  // [OPTIONAL] body to be sent with HTTP monitor
  body: 'Hello, world!',
  // [OPTIONAL] if specified, the HTTP response must contains the keyword to be considered as operational.
  responseKeyword: 'success',
  // [OPTIONAL] if specified, the check will run in your specified region,
  // refer to docs https://github.com/lyc8503/UptimeFlare/wiki/Geo-specific-checks-setup before setting this value
  checkLocationWorkerRoute: 'https://xxx.example.com',
},
5.要修改或更新你的配置,只需再次编辑uptime.config.ts即可。如果你的配置正确,cloudflare将会自动应用于Workers & Pages。
发布者:木木,转载请注明出处:https://blog.huzz.cn/5401.html
 微信
微信  支付宝
支付宝